Wood inlays: Difference between revisions
Appearance
Ttenbergen (talk | contribs) No edit summary |
Ttenbergen (talk | contribs) No edit summary |
||
| (6 intermediate revisions by the same user not shown) | |||
| Line 1: | Line 1: | ||
Raster the area, cut the shape from veneer | Raster the area, cut the shape from veneer or cut two veneers | ||
see [[Adjusting for kerf size | see also [[Internal:Adjusting for kerf size]] | ||
[[File:Laser_cut_inlay_walnut_on_oak.JPG|300px]] | [[File:Laser_cut_inlay_walnut_on_oak.JPG|300px]] | ||
== Notes == | |||
=== mirror the inlay === | |||
Laser cut isn't quite perpendicular along z due to focus, i.e. it's smaller on the top of the cut. So, cut the inlay upside down (i.e. mirror it) so the the outermost part has best chance to fit. | |||
== focus to bottom of inlay? == | |||
This would make the cut the smallest at the bottom of the veneer, which is the top of the final inlay. | |||
[[Category: Laser | [[Category:Laser Cutting]] | ||
[[Category: | [[Category:Personal Project]] | ||
[[Category:Veneer]] | |||
Latest revision as of 17:09, 2021 October 10
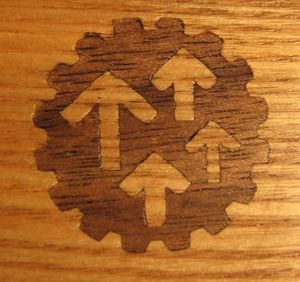
Raster the area, cut the shape from veneer or cut two veneers
see also Internal:Adjusting for kerf size
Notes
mirror the inlay
Laser cut isn't quite perpendicular along z due to focus, i.e. it's smaller on the top of the cut. So, cut the inlay upside down (i.e. mirror it) so the the outermost part has best chance to fit.
focus to bottom of inlay?
This would make the cut the smallest at the bottom of the veneer, which is the top of the final inlay.
